

Introduction: Criss Cross / Crisscross Layered Earrings - Utilizing Color Changes Between Layers in 3D Prints


What started as a greeting card design, evolved into Christmas earrings, and finally became these crisscross cutout layered earrings in a variety of shapes. You can use one of the designs I've created, or use this technique with another shape. Be sure to share pictures of your designs :)
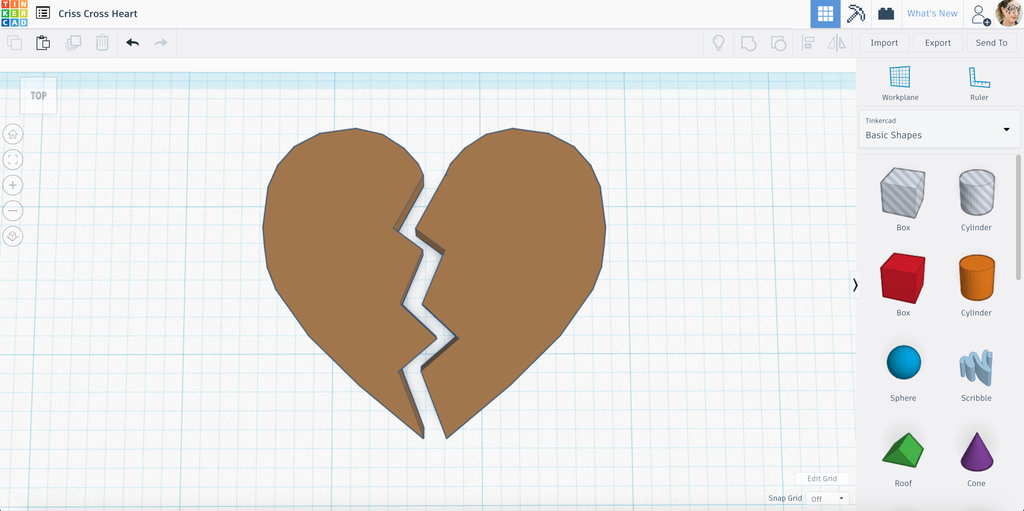
Since I don't have multiple extruders, I like to try to come up with designs that can be enhanced by color changes between layers and really kind of took that to the extreme here with 4 color changes. I am quite happy with the results which I have made in Diamond, Oval, Heart, Star, and Broken Heart shapes.
Instructable 300

You can buy all 5 styles of these earrings in my Etsy Store in whatever colors I have.
Step 1: Supplies


Supplies:
- 3D Printer - I'm using a Prusa MK3
- Slicer - I'm using Simplify3D but Cura should be able to do color changes easily too
- Filament in the colors you want. You can do these in one color, but I think 2 looks best.
- Earwires
- Jewelry Pliers
Originally, these designs were going to be just 2 colors in 2 layers, and while they looked interesting during my test prints with 1 color when I tried them with 2, it was just not working. The top color just overpowered the one below and it didn't look nice. After some rethinking, I decided to make these in 5 layers split between 2 colors and I'm pretty happy with the results. You can see the evolution of the design in the second image.
Step 2: Files

I'll talk about the creation of the designs in the next two steps, but you can get the designs here.
Above you can see each shape and how they look from front and back.


Step 3: Layered Rectangles

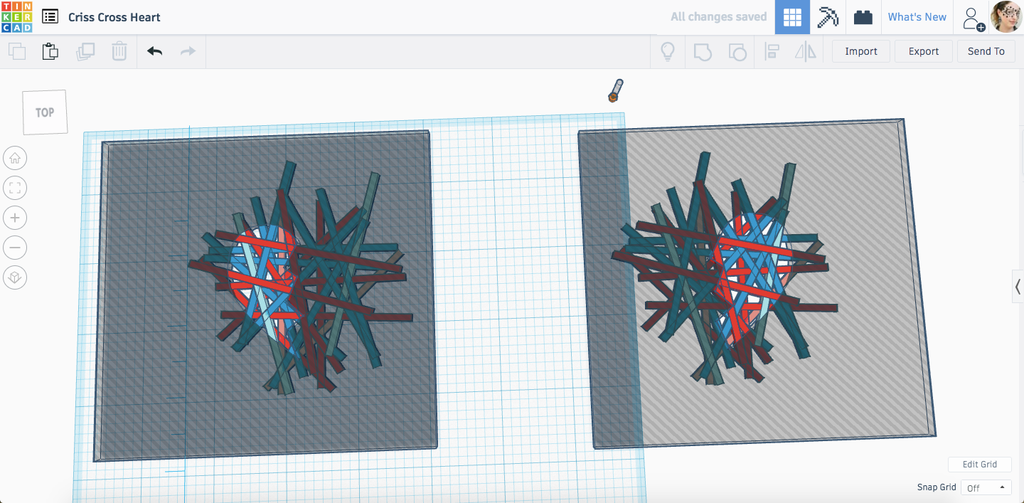
I made these designs using Tinkercad.
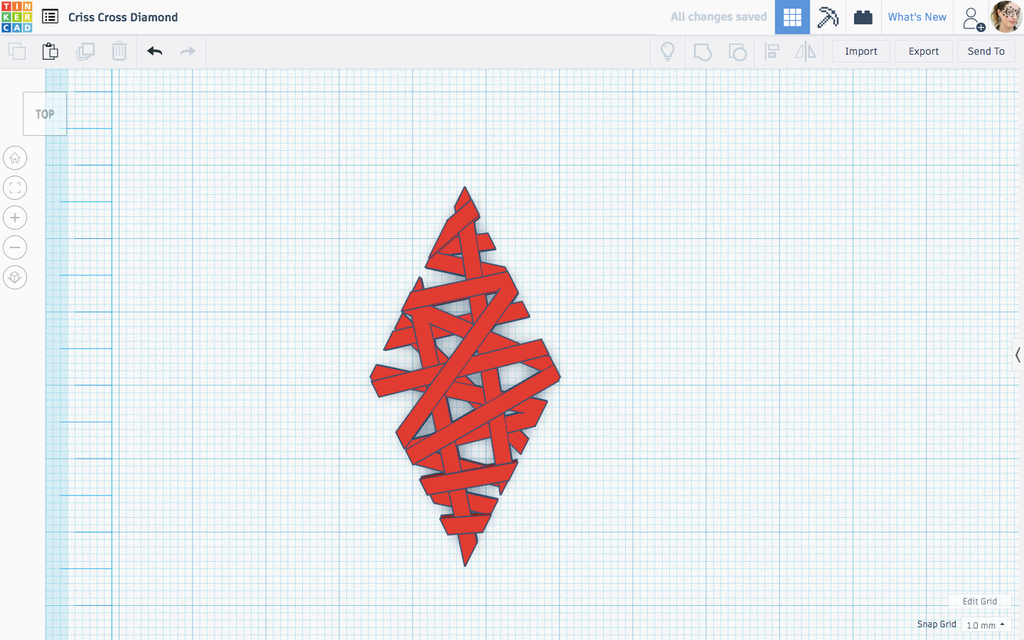
Now, to start with you need the earring shape you want in the size you want. In my example, we are doing the diamond which was 1" wide and 2" tall. The thickness isn't as important right now as you can change it whenever you want.
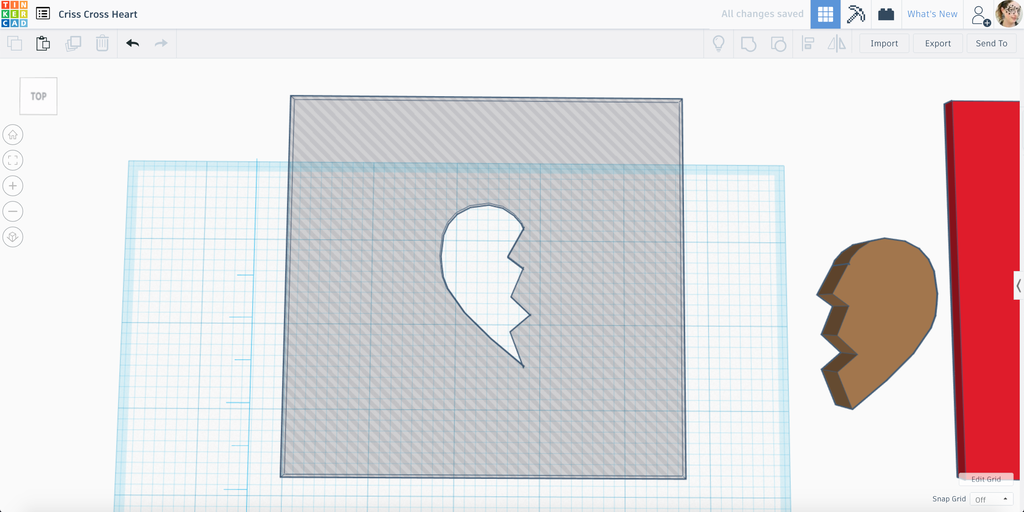
Take this shape and make it a hole. Also, make a large square. It doesn't have to be a certain size, just large enough that it can cut off the ends of your rectangles later, but mine is 4" by 4". Make it solid.
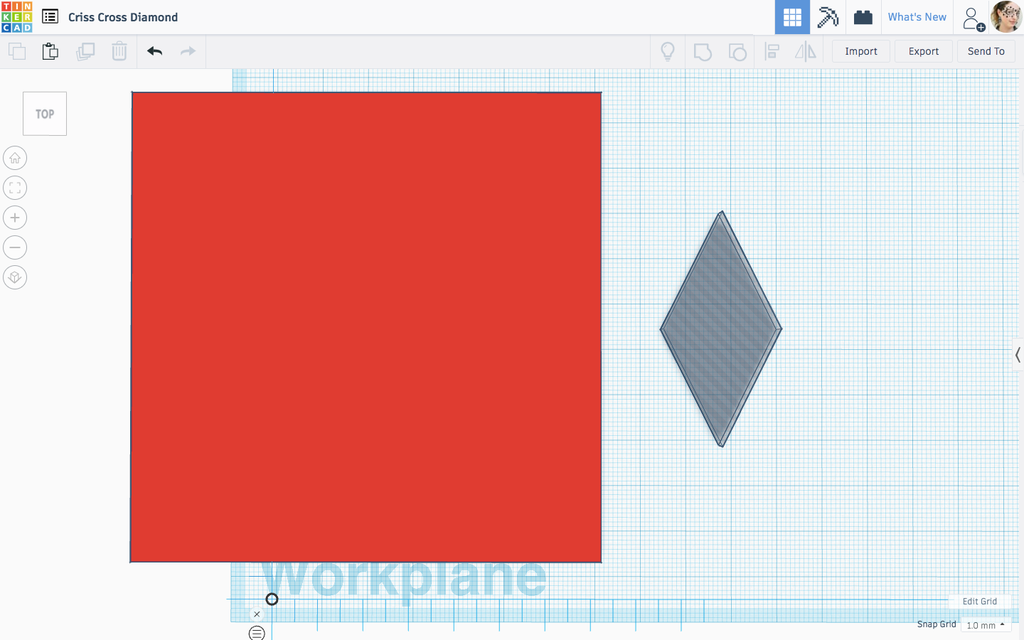
Line the shapes up so the cutout is in the center and group them.
Now you have the earring shape.

Turn it into a hole.
Time for the rectangles.
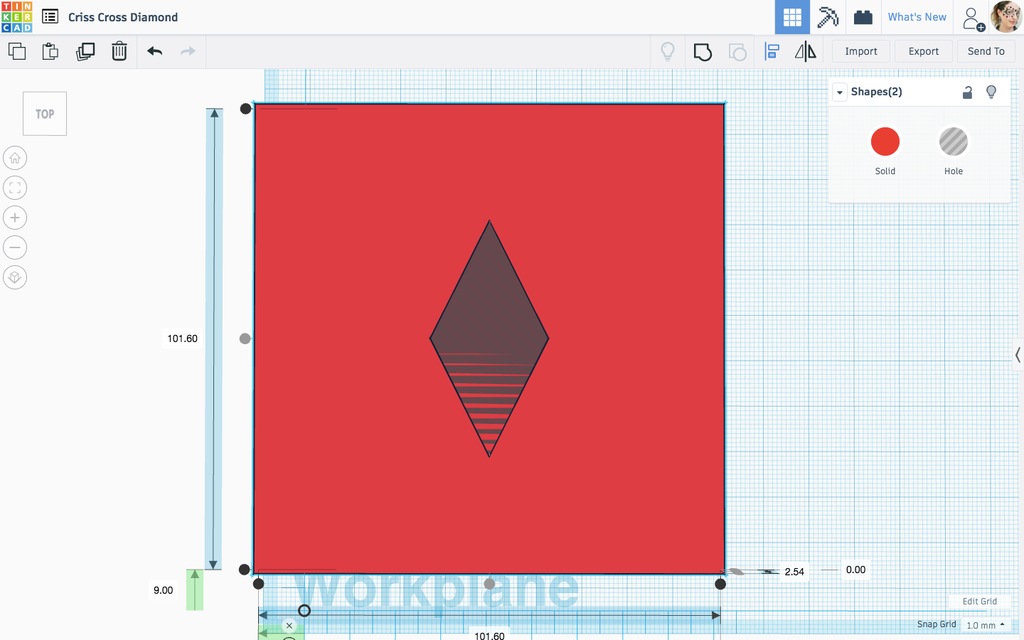
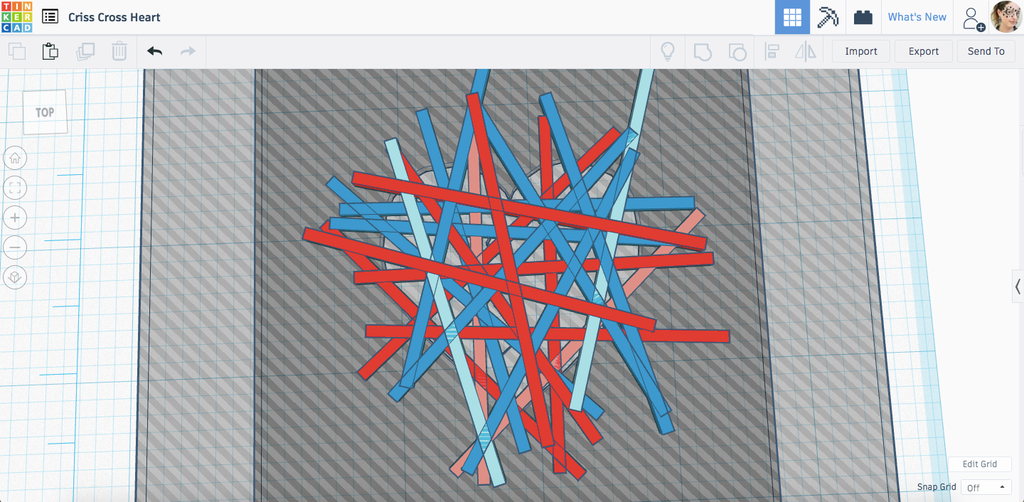
So, this design evolved over time, but in the end, I ended up with an earring design that consisted of rectangles that are the same length and width but different heights. I split the rectangles up into 5 heights and decided they would be two different colors (depending on layer height).
The plan was that the 1st, 3rd, and 5th layers to be one color and the 2nd and 4th layers to be another. Meaning, I needed the same number of rectangles split between layers 1,3,5 and 2,4.
To make sure my color coverage was good, I colored the layers so I could see where the colors would show up and where they would be overlapped and covered.
My goal was for each color to be 2 layers when sliced, meaning the first color went up 2 layers, the second color showed up 4 layers, third was 6 layers, forth was 8 layers and fifth was 10 layers.
Layers/Rectangles: (18 total with 9 of each color) below is # of rectangles, which color, and height
- 3 - color 1 - .5 mm
- 5 - color 2 - .9 mm
- 3 - color 1 - 1.3 mm
- 4 - color 2 - 1.7 mm
- 3 - color 1 - 2.1 mm
This is probably confusing, but the design changed so it's a little difficult to explain how to go from the image above to the one below.
The goal was to make sure the colors were spaced well enough that you could see about an equal amount of each. I started with each color a different layer so I could see where everything was.
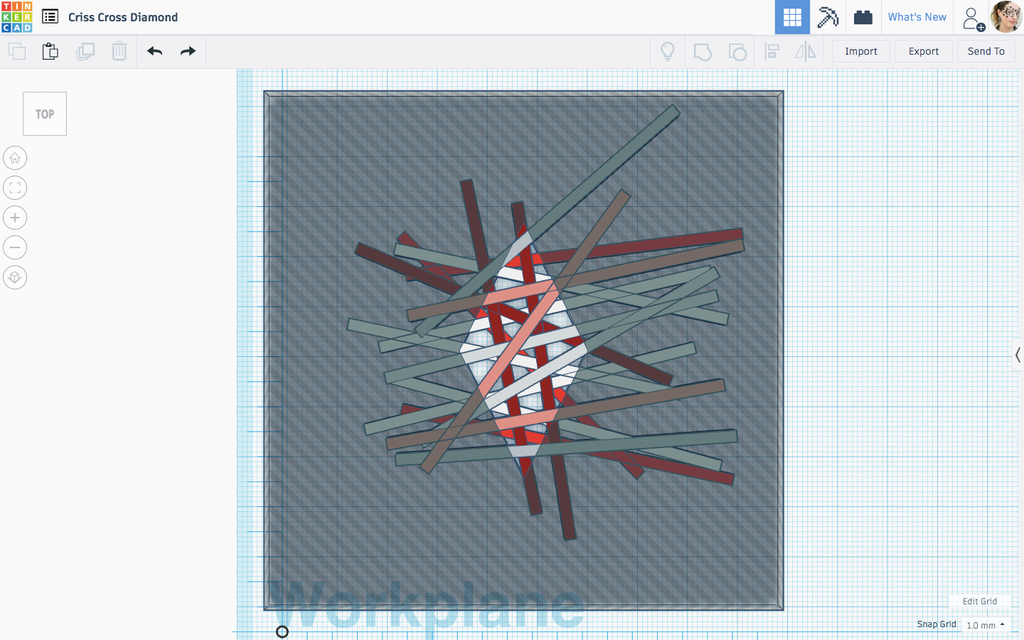
Then, I checked everything by coloring the layers appropriately. So 1, 3, and 5 one color with 2 and 4 another color.
From here, I moved rectangles around until I was happy with the layout. Pay attention to how much of each color you can see and how the edges of the shape look. You want to try to avoid huge gaps that detract from the shape. For example, I tried to make sure the rectangles went out at the diamond points so I would have that definition. Also, make sure you have some definition at the top so you'll be able to attach the loop.

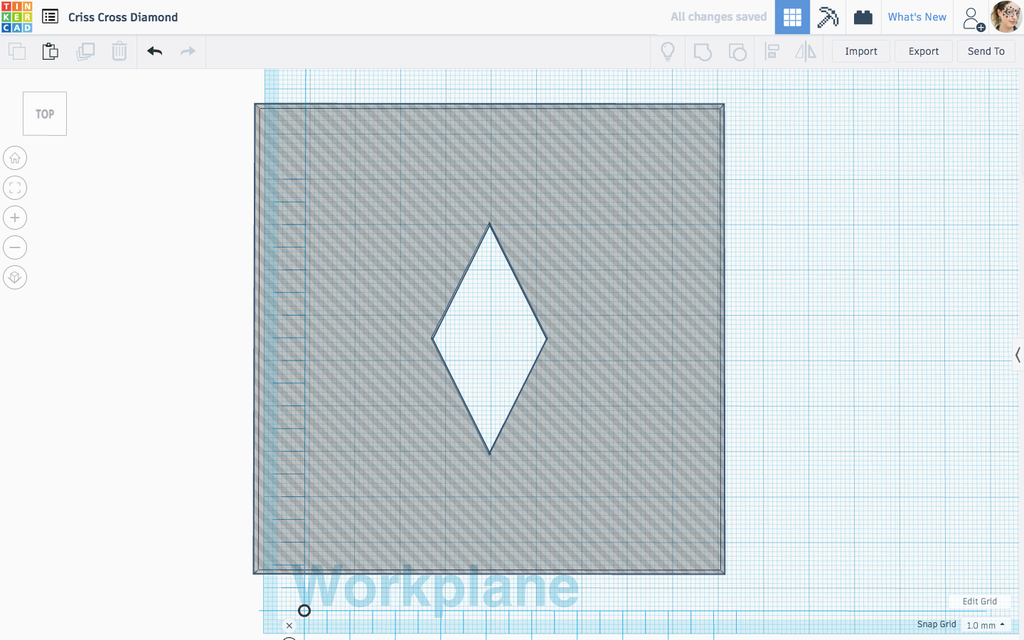
Group the rectangles and the shape cutout. If you don't like the look, ungroup and keep moving things around.
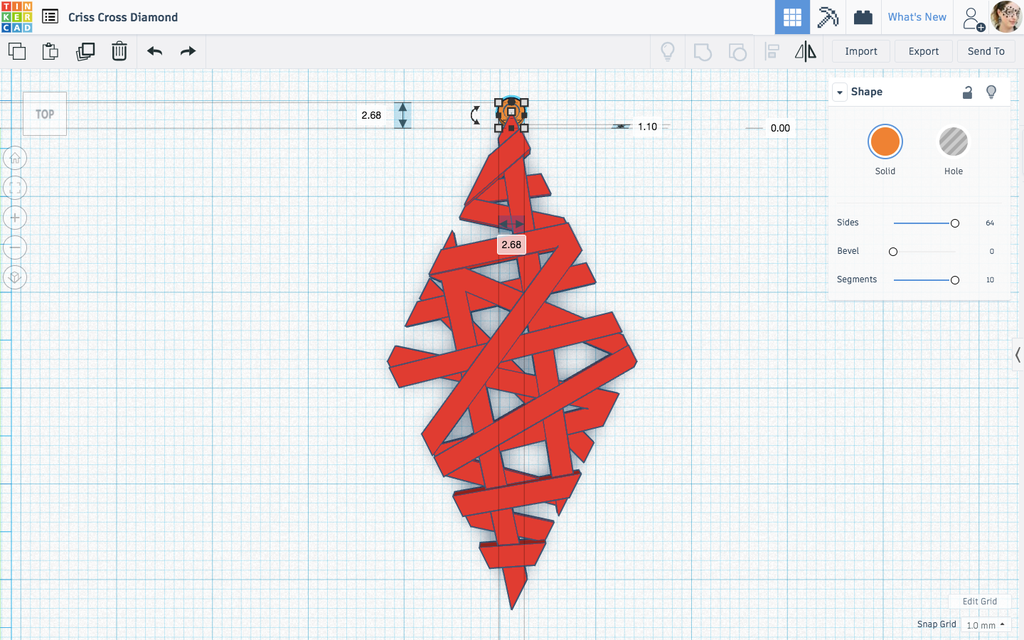
The last thing to do is add a loop. When I can, I prefer to add a hole into the design to make it look more natural, but the thinness of these lines didn't allow it. So, I added on a loop that was made from a cylinder that was 2.68mm in diameter and had a hole that was 1.50mm in diameter.
I made sure everything was centered and connected, then I grouped them.
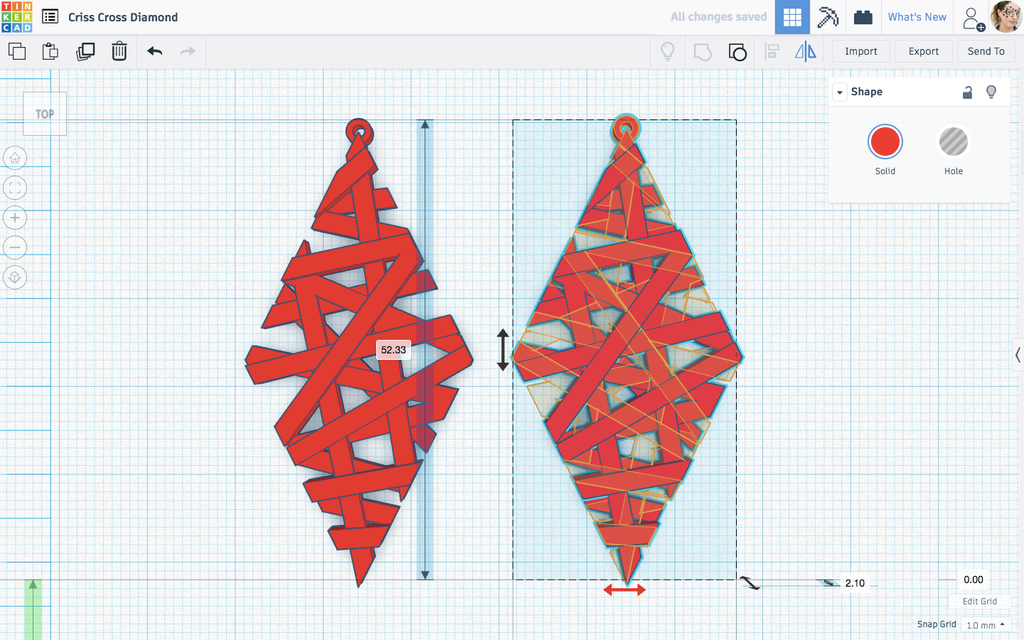
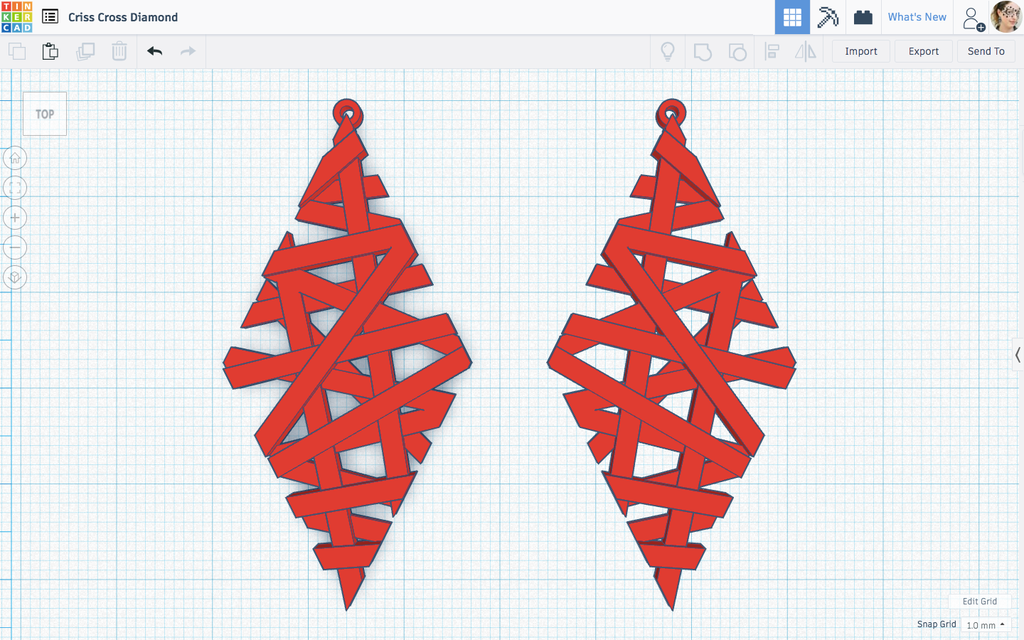
To finish off your earrings, I recommend, copying it and mirroring it. I prefer this to two earrings the same, but it's a personal preference.
Now you have a set of earrings. You can repeat this process for any shape you'd like.
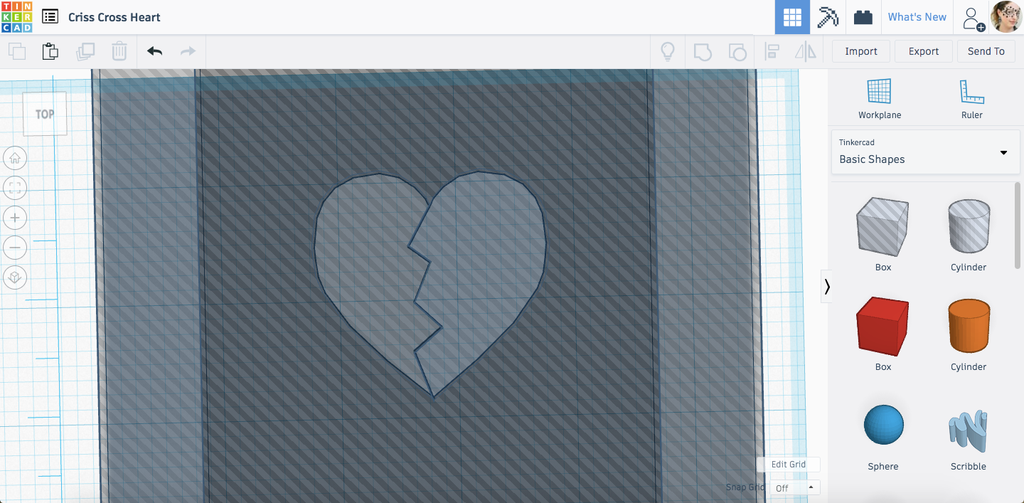
Step 4: How to Make a 3D Print Broken Heart

In this step, I'm going to talk about, not only how I made the broken heart that fits together, but how I got the rectangle/lines to match up between the pieces as well.
To begin with, you need a heart that is the hight you want the earring and about double the width (since we'll be cutting it in half).
Bring in some squares and make them into holes. I turned them 45 degrees and then started messing with their shape and orientation.
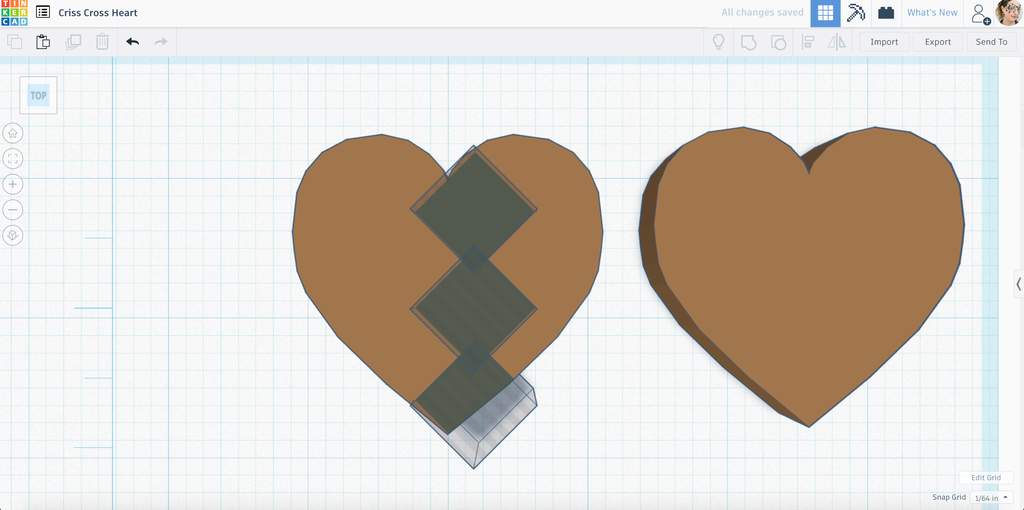
Below you can see how I ultimatly had the squares shaped. One thing I wanted to try to do here was get the shapes to line up with the tip of the heart on the bottom and the dip in the heart on the top to get a clean cut.
Group these shapes together with the heart.
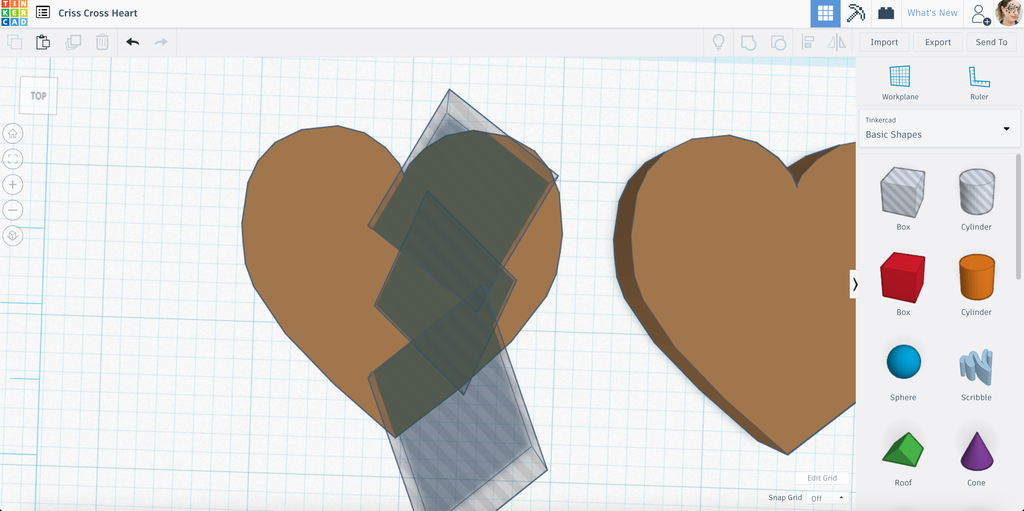
Once I had the cutout, I needed to get rid of the rest of the heart on that side. I just pulled in a square and distorted it until it covered all the bits. Group.
Now I had one half of the heart. I copied it and made the copy into a cutout.
Next, line the cutout with the left and top side of the full heart. Group together.
Now there are two halves that fit together perfectly. If you don't like the way things look here, undo and change up the way the shapes cut into the first half until you like it.
Look, they line up!
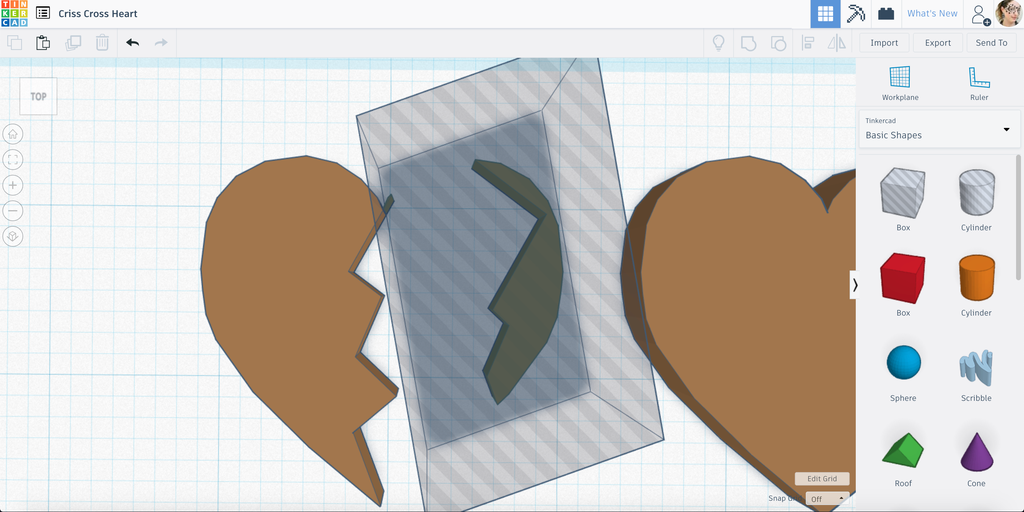
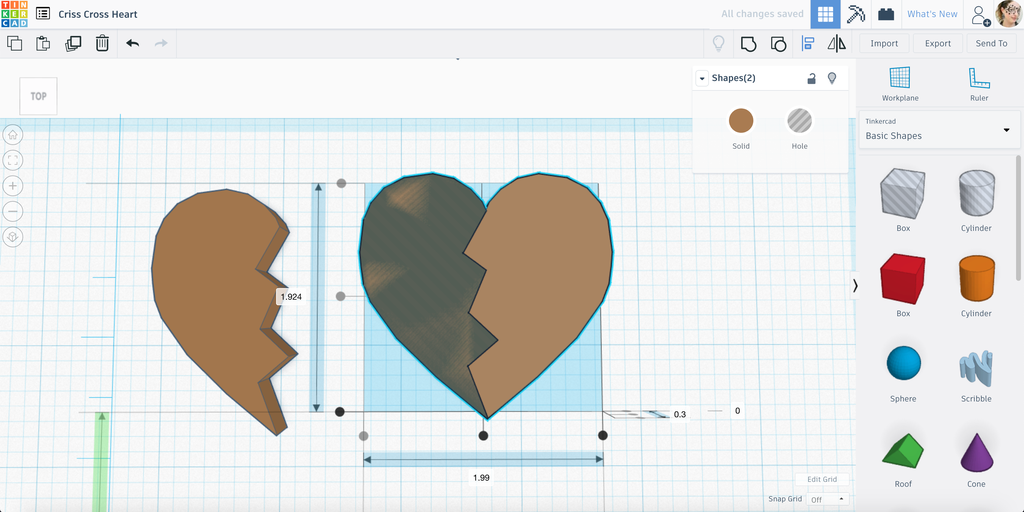
Now, do what you did in the last step with both of these halves so you have cutouts for each earring.
Line them up so they are almost perfectly lined up.
This next part got pretty messy but I had to bring over the rectangles from one of the other earrings I did and started moving them around. I wanted them to kind of line up with the cuts along the middle so I could get a good outline for both sides. Also, I wanted to try to keep the number of rectangles even on both sides of the heart. This took quite a bit of moving things around. I wanted to make sure the rectangles stayed on their own side of the heart but also had some that went all the way across so you could see that they lined up together.
To make it easier to do this, I took the heart cutouts and moved them down out of the way.
Once I was done, I had to bring the cutout back up to 0. 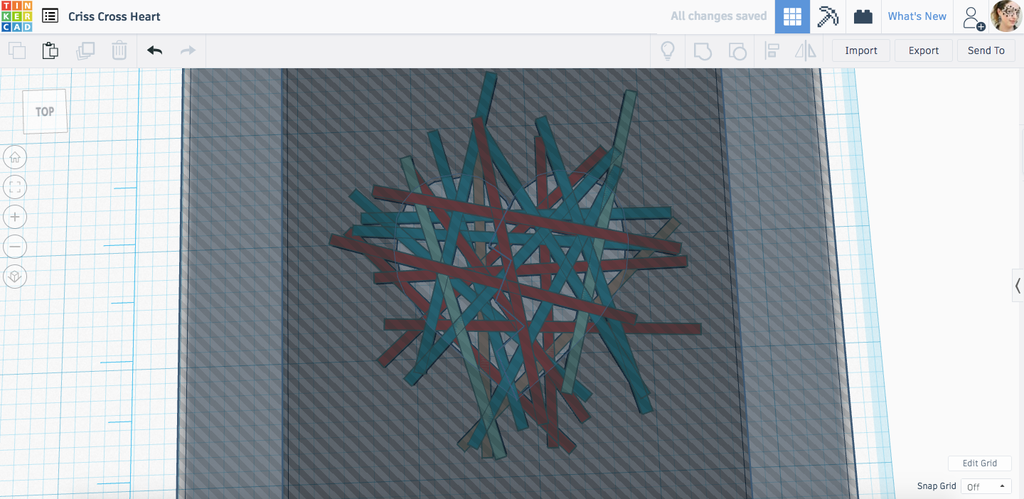
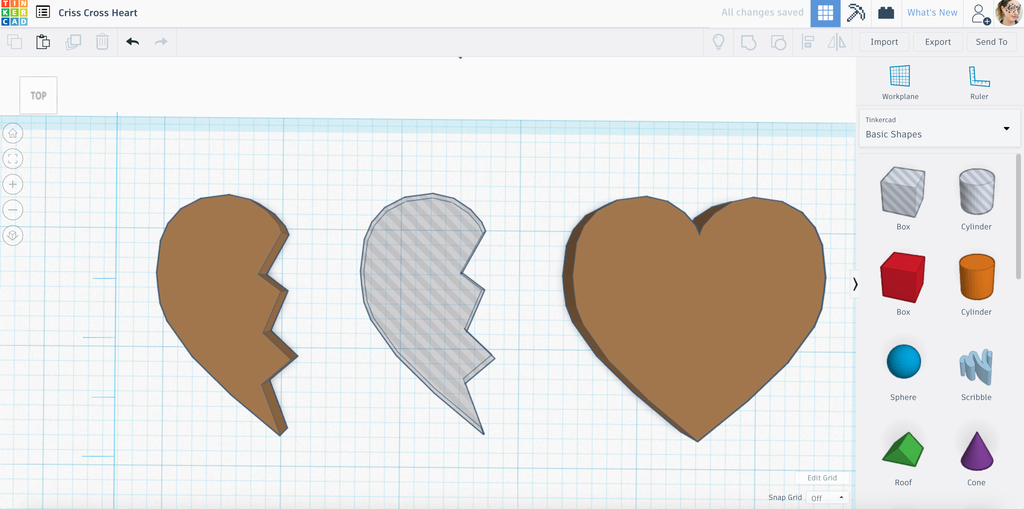
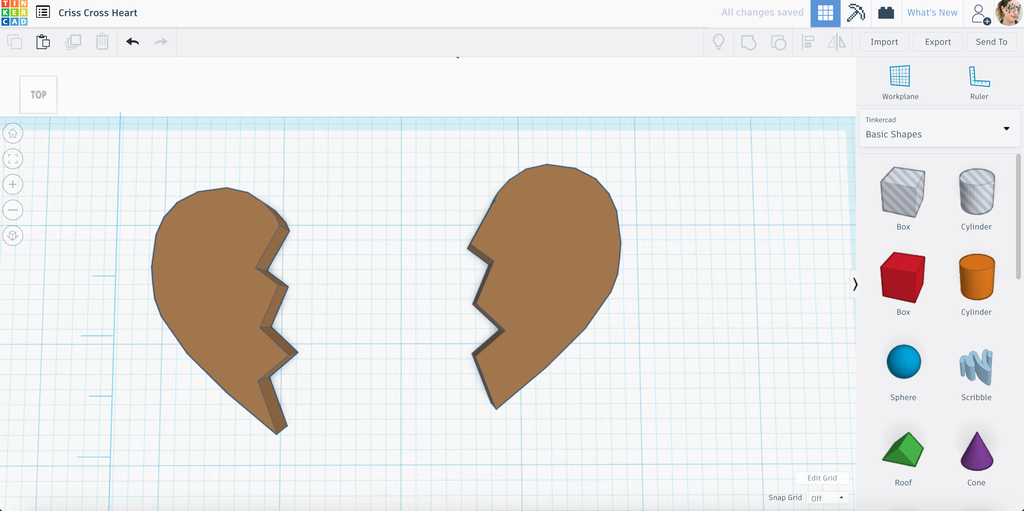
To get the separate sides/hearts, I copied everything and moved it out of the way. Then, I deleted one side on each. So for the left, I deleted the right heart, for the right side I deleted the left heart.
Below you can see the individual hearts. Group these.
Make sure nothing is hanging out on this own. All parts need to be connected. At this point, see if you like how the individual heart sides look. If not, you need to undo until you are back to having one set of everything and move the rectangles around until you are happy.
Now that I had the hearts, it was time to add the loops as I did in the last step. I originally tried to line everything up in the middle, but then I moved things if I had to to make sure the loop attached to the heart. For the heart on the right, I had to move the loop over a bit so it stayed connected.

Two beautiful pieces of a broken heart.

Time to slice!
Step 5: Slicer


I'm using Simplify3D but Cura is free and has a lot of things you can adjust and should work as well.
The important things to keep in mind are:
- 100% infill
- 1 Outline
- 35% Outline Overlap
- Color Changes before layers 3, 5, 7, and 9. If you are adding in extra script, it will look like this:
- {REPLACE "; layer 3, Z =" "M600\n; Color Change, Z ="}
- {REPLACE "; layer 5, Z =" "M600\n; Color Change, Z ="}
- {REPLACE "; layer 7, Z =" "M600\n; Color Change, Z ="}
- {REPLACE "; layer 9, Z =" "M600\n; Color Change, Z ="}
I ended up doing 1 outline and 35% overlap because I was just having so much trouble getting gaps to fill. You don't have to use these settings, but I recommend doing tests with just one color and making sure you get full coverage before you do your final prints.
Step 6: Printing


Time to print!
These shouldn't take too long, but you have to hang around for all the color changes. You should change the color 4 times.
This is pretty self-explanatory, assuming the slicer did its job and put in the color changes.
Change your color back and forth and you should end with the same color you started with.
Step 7: Make Earrings


Since the loop is already oriented right, all you should need to do is put on the ear wire and you are done!
If it isn't oriented right, just pop on a small jump ring between the print and the earring.
Step 8: A Look at All of the Designs


Here is a look at all of the designs I've created so far using this method and a variety of color combinations.
Step 9: Bonus! - Multi-Media Drop Diamond Design


This drop diamond design is meant to be printed with a multi-media extruder in 5 colors. I tried out a few color combinations. The transparent ones came out a little trippy.


Participated in the
Epilog X Contest


